For this Blog entry please take extra care and think twice. It is very easy to destroy hardware and I will not guarantee
anything!
The hardware I used was from AZdelivery. At least in germany they seem to dominate the market for this type of hardware on
the usual online platforms. Since they probably are not building the pcbs themselves, it is possible, that they might change their
PCB layouts.
They got an ESP32 developmentboard
which works more or less like an Arduino. It has its quirks though. With the one I got, for example, you need to keep the 'boot'
button pressed if you want to flash it, otherwise, the IDE cannot connect.
My display is also from the same company.
They also have a tutorial, but sadly the pinning is different.
But in combination with the setup file from the TFT_eSPI library mentioned before, the following connection chart can be worked out:
| TFT name | TFT pin | ESP32 pin | library name |
|---|---|---|---|
| GND | 1 | GND | GND |
| VCC | 2 | 3V3 | 3V3 |
| SCK | 3 | G18 | TFT_SCK |
| SDA | 4 | G23 | TFT_MOSI |
| RES | 5 | G14 | TFT_RST |
| RS | 6 | G2 | TFT_DC |
| CS | 7 | G17 | TFT_CS |
| LED_A | 8 | 5V | 5V |
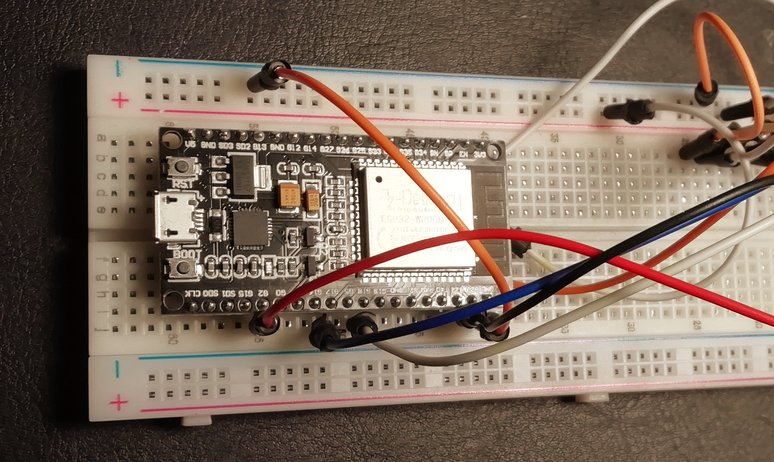
When setting up your device a breadboard like shown below can be helpful. But be very careful! USB delivers 5V of voltage. The ESP32 on the other hand runs on 3.3V. So if you are not careful and put 5V on any other Pin than the 5V pin, it can very well destroy your device!
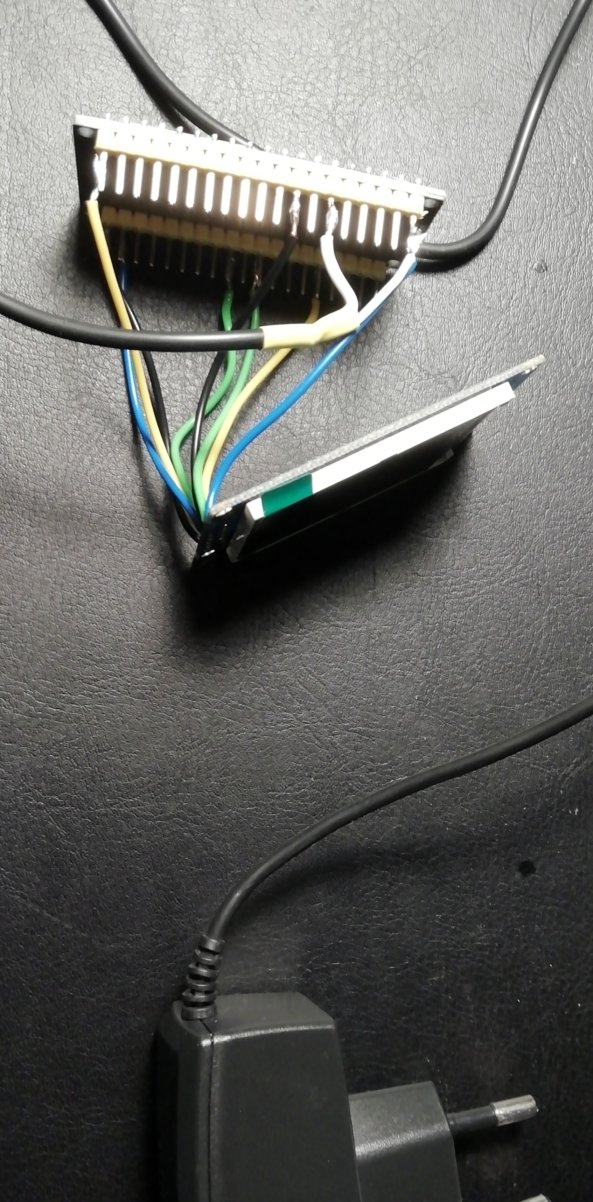
If you want to run your weatherstation as a standalone device, you might not necessarily want to power it via a USB cable. USB cables are usually quite short
and are better used where you also want to transfer data.
But possibly you still have an old mobile phone charger lying around somewhere: If it has around 5V DC output, you can probably use it to power your project.
You need to connect it to 5V and GND on your ESP32 (double check pin and polarity!). If you wnat to connect things more permanently,
it might be better to go from the breadboard to soldered connections and it might look like this:
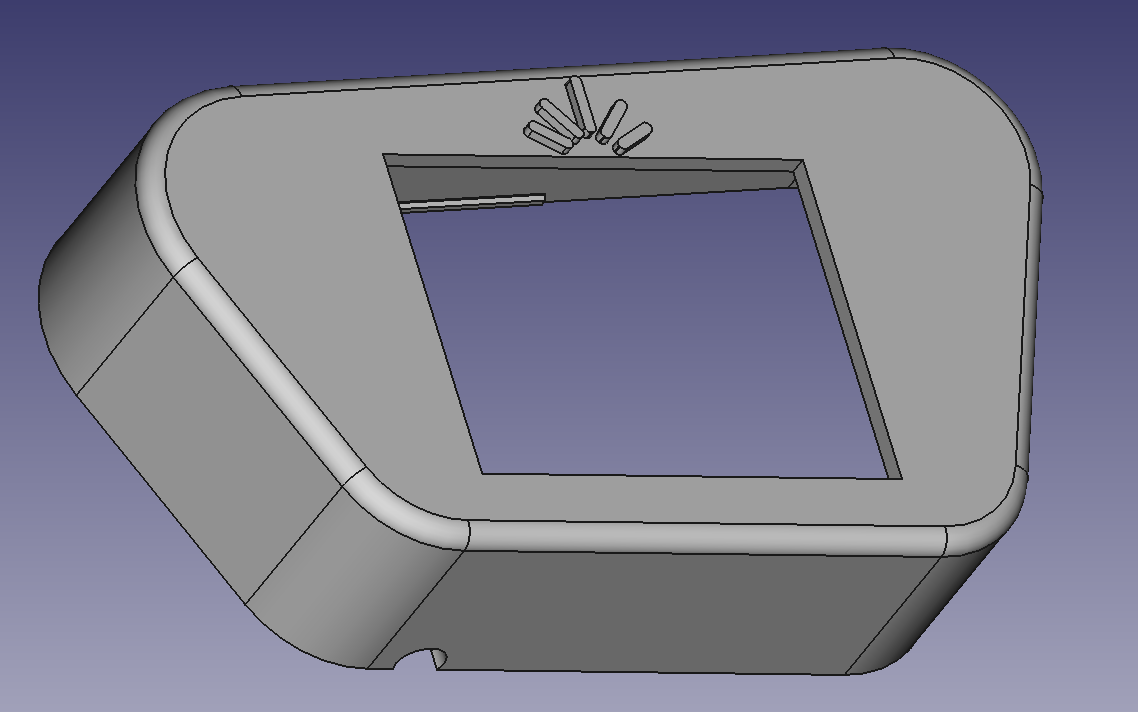
Of course, you do not want all those connections be dangeling around. Which means, an enclosure is needed! You can download the one in the picture from my thingiverse account.
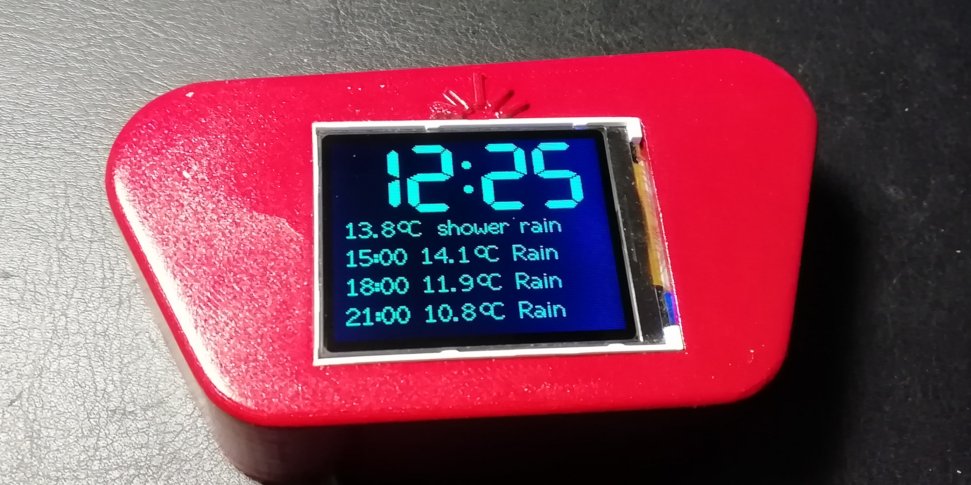
This can be printed in PLA for example. After that, a bit of sandpaper and filler (used for car repairs) help to prepare for spray painting. Here I used a metallic lacquer used for car repairs. If everything is assembled, it might look like this:
Before you put everything together, remember to flash your ESP32 with the code needed. If you do not want to program it yourself, you can use mine, which is available at gitlab.